This manual serves as your guide to confidently operating and maintaining your JVC car stereo, covering installation, features, troubleshooting, and maintenance for optimal performance.
1.1 Purpose of the Manual
This manual is designed to guide you through the safe and effective use of your JVC car stereo. It provides detailed instructions for installation, operation, and troubleshooting, ensuring you maximize its features. The manual covers essential functions, advanced settings, and maintenance tips to enhance your audio experience. By following the guidelines, you can optimize performance, resolve common issues, and enjoy seamless connectivity with various devices. This comprehensive resource aims to empower you with the knowledge needed to fully utilize your JVC car stereo’s capabilities.
1.2 Key Features of JVC Car Stereos
JVC car stereos offer a range of innovative features designed to enhance your driving experience. These include Bluetooth connectivity for hands-free calls and wireless music streaming, SiriusXM integration for access to premium channels, and USB/AUX inputs for seamless device connectivity. Many models also feature customizable equalizer settings, allowing you to tailor the sound to your preferences. Additionally, smartphone linkage enables control of compatible apps directly from the stereo interface, while advanced display options provide clear and intuitive navigation. These features combine to deliver a modern, high-quality audio experience on the road.
1.3 Safety Precautions and Warnings
Ensure proper installation and usage to avoid electrical interference or damage. Avoid adjusting settings while driving to prevent accidents. The stereo emits radio frequency energy; follow instructions to prevent harmful interference. Do not modify the device, as it may void the warranty or cause malfunctions. Keep the stereo away from extreme temperatures and moisture. Use only authorized accessories to maintain performance and safety. Refer to the manual for correct operation and adhere to all warnings to ensure safe and reliable use of your JVC car stereo.

Installation and Setup
This section guides you through the process of installing and setting up your JVC car stereo, ensuring a smooth and proper integration into your vehicle.
2.1 Pre-Installation Checklist
- Gather all necessary tools, including screwdrivers and wiring connectors.
- Ensure your vehicle’s power is off to prevent electrical hazards.
- Disconnect the battery to safeguard against short circuits.
- Check the wiring harness for compatibility and damage.
- Review the manual to understand stereo features and settings.
- Prepare the dashboard area for mounting the stereo.
- Ensure compatibility with your vehicle’s electrical system.
2.2 Step-by-Step Installation Guide
- Disconnect the battery to prevent electrical shocks.
- Remove the old stereo by gently prying the trim and disconnecting wires.
- Install the mounting kit and connect the wiring harness.
- Connect the power, ground, and accessory wires to the correct terminals.
- Mount the new stereo securely in the dashboard.
- Connect external devices like Bluetooth microphones or antennas.
- Reconnect the battery and test all features.
2.3 Initial Setup and Configuration
After installation, power on the stereo and set the clock. Adjust display settings like brightness and color to your preference. Set audio preferences such as equalizer presets and balance. Enable Bluetooth if needed and pair your device. Check for firmware updates and install them to ensure optimal performance. Familiarize yourself with the menu system and customize shortcuts for easy access to frequently used features. Ensure all external devices are properly connected and configured for seamless operation.

Operating the JVC Car Stereo
Learn to use basic controls, adjust settings, and navigate the menu system for seamless operation of your JVC car stereo.
3.1 Basic Controls and Functions
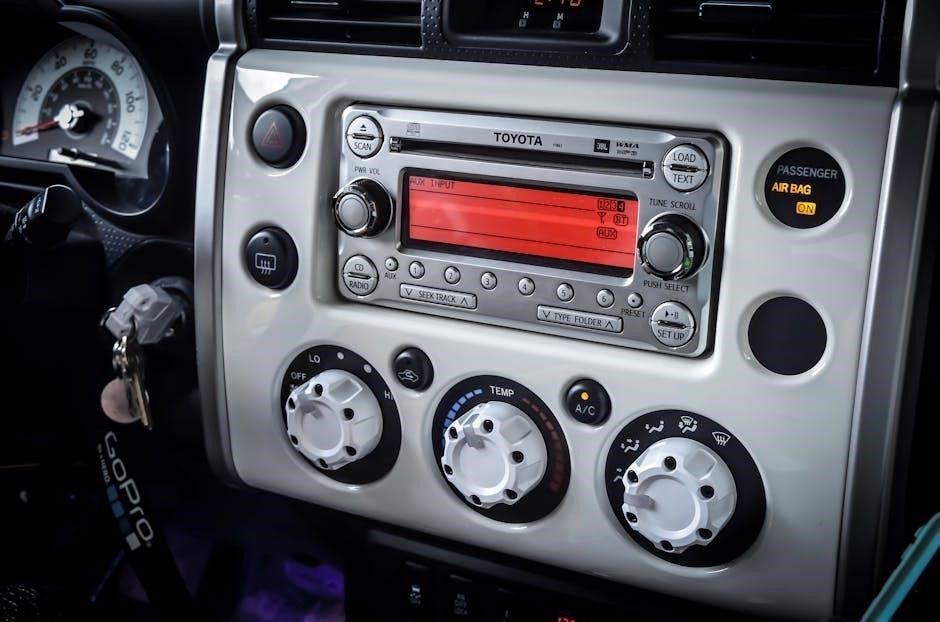
The JVC car stereo features intuitive controls for seamless operation. The volume knob adjusts sound levels, while playback buttons manage tracks and playback modes. The source button toggles between radio, Bluetooth, USB, and AUX inputs. Mute functionality is accessed by pressing and holding the volume knob. For hands-free calls, the phone button answers or ends calls. Basic functions like play, pause, and track skip are conveniently located for easy access. These controls ensure a user-friendly experience, allowing you to focus on driving while enjoying your music and calls.
3.2 Adjusting Settings and Customization
The JVC car stereo allows extensive customization to tailor your listening experience. Users can adjust equalizer settings, selecting from predefined presets or creating custom profiles. Bass boost and sound enhancement features can be activated for deeper lows and clearer highs. The stereo also supports balance and fade adjustments, enabling precise control over speaker output distribution. Additional customization options include display settings, menu language, and button illumination. These features ensure a personalized setup, enhancing both audio quality and user convenience, making every drive more enjoyable and tailored to individual preferences.
Customize your JVC car stereo for a tailored audio experience. Adjust the equalizer with preset options or create your own sound profile. Activate bass boost for deeper lows and enable sound enhancement for clearer highs. Balance and fade controls allow precise speaker output distribution. Personalize display settings, menu language, and button illumination to match your preferences. These customization options ensure optimal audio quality and user convenience, making every drive enjoyable and unique to your listening style.
3.3 Using the Display and Menu System
The JVC car stereo features a high-resolution color display for easy navigation. Use the touchscreen or remote to access menus, browse media, and adjust settings. Customize the display with brightness controls and downloadable wallpapers. The menu system provides intuitive access to features like SiriusXM, Bluetooth, and USB inputs. Set the clock and date, and explore additional options for a personalized experience. The display also shows song information, caller ID, and navigation data, enhancing your driving experience with clarity and convenience.

Advanced Features
Explore advanced features like Bluetooth connectivity, SiriusXM integration, and USB/AUX input support. Enhance your audio experience with customizable sound settings and app integration for seamless control.
4.1 Bluetooth Connectivity and Pairing
Pair your smartphone with the JVC car stereo via Bluetooth for seamless audio streaming and hands-free calls. Ensure your device is in pairing mode, then select the stereo from your phone’s Bluetooth list. Once connected, you can stream music, take calls, and control playback. Operations may vary depending on the connected device. For issues, restart both devices or forget the pairing in your phone’s settings. Refer to the manual for specific instructions and troubleshooting tips to ensure optimal Bluetooth performance.
4.2 SiriusXM Satellite Radio Integration
Experience uninterrupted entertainment with SiriusXM Satellite Radio on your JVC car stereo. Enjoy 65 commercial-free music channels and 50 sports, news, and entertainment channels. Activate your subscription, ensure the antenna is properly connected, and tune into your favorite stations. Use the stereo controls to browse channels, save favorites, and customize your listening experience. For optimal reception, avoid obstructions and ensure the antenna is securely installed. Refer to the manual for specific setup instructions and troubleshooting tips to maximize your SiriusXM experience on the road.
4.3 USB and AUX Input Connectivity
Enhance your listening experience by connecting external devices via USB or AUX inputs. The USB port supports various audio formats, enabling seamless playback from flash drives or smartphones. For analog connections, the AUX input allows you to link devices like MP3 players or older phones. Ensure proper connectivity by using compatible cables and verifying device settings. Troubleshoot issues by checking connections or updating firmware. This feature expands your entertainment options, providing flexibility and convenience for diverse audio sources on the go.

Sound Customization
Personalize your audio experience with customizable settings, including equalizer presets, bass boost, and balance adjustments, allowing you to tailor sound output to your preference for optimal listening enjoyment.
5.1 Equalizer Settings and Presets
Your JVC car stereo offers customizable equalizer settings to enhance your audio experience. Adjust frequency levels for bass, midrange, and treble to suit your music preferences. Preset options like “Rock,” “Pop,” and “Jazz” provide quick access to optimized sound profiles. Users can also create and save custom presets for personalized listening. Utilize the “My Sound EQ” feature to further refine audio quality, ensuring a tailored sound output that matches your musical tastes and vehicle acoustics for an immersive listening experience on every drive.
5.2 Bass Boost and Sound Enhancement Features
Enhance your audio experience with JVC’s bass boost and sound enhancement features. The Dynamic Bass Boost adjusts low-frequency response for deeper, richer bass. Customize settings to match your music genre or vehicle acoustics. Additional features like subwoofer controls and low-pass filters optimize bass output. Use the My Sound EQ app to tailor sound enhancements further, ensuring a balanced and immersive listening experience. These features allow you to fine-tune your audio for maximum enjoyment, whether you’re listening to music or podcasts.
5.3 Balancing and Fading Audio
Balance and fade controls allow you to evenly distribute sound across your car’s speakers. Use the fader to adjust front-to-rear audio levels and the balance control for left-to-right distribution. These settings help compensate for the vehicle’s acoustics, ensuring clear sound from all seats. Experiment with adjustments while playing familiar music to achieve optimal balance. Proper use of these features enhances listening comfort and ensures all passengers enjoy a consistent audio experience. Regularly check and adjust these settings to maintain sound quality across different driving conditions.

Smartphone and App Integration
Connect your smartphone via Bluetooth or USB for seamless app control, streaming, and hands-free operations. Compatible apps enhance functionality, while firmware updates ensure optimal performance and compatibility.
6.1 Compatible Apps and Software
JVC car stereos are compatible with various smartphone apps, enhancing your driving experience. The JVC Smartphone Link app allows seamless control of music, navigation, and voice commands. My Sound EQ app enables custom audio tuning, while Wallpaper Download personalizes the display. These apps are designed for both iOS and Android devices, ensuring universal compatibility. Regular updates ensure optimal performance and new features. By integrating these apps, users can enjoy a tailored and intuitive entertainment system while staying connected on the road.
6.2 Smartphone Linkage and Control
Connect your smartphone to the JVC car stereo via Bluetooth or USB for seamless control. Use the stereo’s controls to manage music playback, adjust volume, and handle calls. Ensure your device is paired correctly through the stereo’s menu. Once connected, you can switch between music, calls, and apps effortlessly. Voice command features may also be available, depending on your smartphone’s capabilities. This integration enhances your driving experience by keeping you connected and entertained safely on the road.
6.3 Downloading and Updating Firmware
Regular firmware updates ensure your JVC car stereo performs optimally. Visit the official JVC website or use the JVC smartphone app to check for updates. Download the latest firmware to your computer or smartphone, then transfer it to your stereo via USB. Follow on-screen instructions to install the update. Updating firmware improves functionality, adds features, and fixes issues. Always back up settings before updating to avoid losing custom configurations. Keep your stereo up-to-date for the best performance and compatibility with new devices and software.

Troubleshooting Common Issues
This section helps resolve common problems with your JVC car stereo. Includes diagnosing connectivity issues, fixing audio distortion, and resetting to factory settings for optimal performance.
7.1 Diagnosing Connectivity Problems
Identify and resolve connectivity issues with your JVC car stereo by checking Bluetooth pairing, USB, and AUX connections. Ensure devices are properly linked and powered on. Reset the stereo if necessary. Consult the manual for specific troubleshooting steps tailored to your model, addressing common issues like lost connections or failed pairing attempts. Verify firmware updates and ensure compatibility with connected devices for seamless operation.
7.2 Resolving Audio Distortion or No Sound
If experiencing audio distortion or no sound, check connections and ensure all cables are secure. Adjust equalizer settings or reset to factory defaults. Verify volume levels and mute functionality. Check for firmware updates and install the latest version. If issues persist, perform a factory reset or consult the manual for detailed troubleshooting steps specific to your JVC model. Ensure proper installation and compatibility with external devices to restore optimal audio performance.
7.3 Resetting the Stereo to Factory Settings
To reset your JVC car stereo to factory settings, press and hold the volume and select buttons simultaneously for 5-10 seconds until the stereo restarts. This process will erase all custom settings, returning the system to its original configuration. Ensure all external devices are disconnected before performing the reset. After restarting, the stereo will display a confirmation message. This step is useful for resolving persistent issues or preparing the system for a new installation. Always back up your settings before resetting. Refer to the manual for model-specific instructions if needed.
Maintenance and Care
Regularly update firmware, clean the screen gently, ensure proper ventilation, inspect cables, and protect from extreme temperatures and moisture to maintain optimal performance and longevity.
8.1 Cleaning the Stereo and Screen
Regular cleaning ensures optimal performance and longevity. Use a soft, dry cloth to wipe the stereo’s exterior and screen. For tougher stains, dampen the cloth lightly with water, but avoid harsh chemicals or abrasive materials. Never spray liquids directly on the unit. For the screen, use a microfiber cloth and a mild, non-amplified glass cleaner. Gently wipe in one direction to prevent streaks. Avoid exposure to direct sunlight or extreme temperatures during cleaning. Store the stereo in a cool, dry place when not in use to maintain its condition. Always follow these steps to preserve your stereo’s functionality and appearance.
8.2 Updating Software and Firmware
Regular software and firmware updates are essential to ensure your JVC car stereo performs optimally. Visit the official JVC website to check for the latest updates specific to your model. Download the update file to a USB drive, then connect it to your stereo. Follow the on-screen instructions to install the update. Never turn off the power during the update process. Once complete, restart the stereo to apply the changes. Updating ensures compatibility with the latest features and improves overall performance. Always use authorized sources to download updates to avoid potential issues.
8.3 Storing the Stereo During Off-Season
When storing your JVC car stereo during the off-season, disconnect the battery to prevent drainage. Clean the unit thoroughly and use a protective cover to shield it from dust. Store it in a cool, dry place away from direct sunlight and moisture. Avoid extreme temperatures, as they may damage the electronic components. Ensure the stereo is securely packed to prevent movement during storage. Before reusing, inspect the unit for any damage and reconnect the battery. Proper storage helps maintain performance and longevity, ensuring optimal functionality when you resume use. Always follow the manufacturer’s guidelines for storage.

Technical Specifications
JVC car stereos feature high-quality sound with precise power output and impedance ratings, ensuring optimal performance. They offer wide frequency response and excellent signal-to-noise ratios for clear audio reproduction.
9.1 Power Output and Impedance
JVC car stereos deliver high-quality sound with a continuous power output of 22 watts per channel (RMS) and a peak power of 50 watts per channel. The impedance range is typically 4-8 ohms, ensuring compatibility with most car speakers. Proper installation and impedance matching are crucial to avoid overheating and ensure optimal performance. Always refer to the specifications in your manual for precise details, as power output and impedance may vary slightly by model. This ensures your system operates efficiently and provides the best audio experience possible.
9.2 Frequency Response and Signal-to-Noise Ratio
JVC car stereos boast a wide frequency response range of 20 Hz to 20 kHz, ensuring precise sound reproduction across bass, midrange, and treble. The signal-to-noise ratio (SNR) typically exceeds 80 dB, minimizing background noise and delivering clear, distortion-free audio. These specifications ensure high-quality sound performance, whether listening to music, podcasts, or other audio content. Proper installation and settings optimization are recommended to maximize these technical capabilities and enjoy an immersive listening experience tailored to your preferences.
9.3 Compatibility with External Devices
JVC car stereos are designed to seamlessly integrate with various external devices, including smartphones, USB drives, and auxiliary input sources. Bluetooth connectivity allows wireless streaming from compatible devices, while USB ports support high-quality audio playback. SiriusXM readiness enables access to satellite radio channels, offering diverse entertainment options. Auxiliary inputs provide flexibility for connecting older devices. These features ensure compatibility with a wide range of external devices, enhancing your in-car audio experience with convenience and versatility.

Warranty and Support
JVC offers comprehensive warranty coverage and dedicated customer support. For assistance, visit authorized service centers or contact JVC support directly for reliable help and solutions.
10.1 Understanding the Warranty Terms
JVC car stereos come with a limited warranty covering manufacturing defects for a specified period. The warranty typically includes parts and labor, ensuring repairs or replacements at no cost. Coverage varies by region and model, with details provided in the manual. Proper installation and adherence to usage guidelines are essential to maintain warranty validity. For specific terms, refer to the warranty section in your manual or contact JVC support for clarification.
10.2 Contacting JVC Customer Support
For assistance, visit the official JVC website and navigate to the support section. Submit inquiries through the contact form or find regional support numbers. Ensure to have your product model and serial number ready for efficient service. Additionally, authorized service centers listed on the JVC website offer professional help for complex issues. Online resources, including FAQs and downloadable manuals, are also available to address common concerns promptly and effectively.
10.3 Finding Authorized Service Centers
To locate an authorized service center, visit the JVC website and use the dealer locator tool. Enter your location to find nearby centers. These centers provide genuine parts and expert repairs. Ensure your stereo is serviced by authorized technicians to maintain warranty validity and optimal performance. For further assistance, contact JVC customer support for a detailed list of approved centers in your area.